Wings Editor
 The Wings Editor is very similar
to the Ships Editor. Whenever
the same option exists in
both the Ships Editor and the Wings Editor it is usually better to
use the
Wings Editor version as this ensures all ships in the wing remain
the same and
none are accidentally missed out.
The Wings Editor is very similar
to the Ships Editor. Whenever
the same option exists in
both the Ships Editor and the Wings Editor it is usually better to
use the
Wings Editor version as this ensures all ships in the wing remain
the same and
none are accidentally missed out.
# Of Waves by default is set to 1. If this is
increased as
soon as the number of ships remaining gets down to the number of
ships
specified in Wave Threshold a new wave of ships
will become
eligible to jump in. By default the Wave Threshold
is 0
meaning you have to kill all the ships in a wave before the next
one will be
triggered.
The Delay Between Waves is the time that an
eligible wave
will wait before they appear. It is very important to set this if
the
Wave Threshold is 0 as otherwise new ships will
appear as soon
as the player destroys the last ship in the previous wave. This
can give the
impression that they were sitting around waiting for their friends
to die
before jumping in.
Reinforcement Unit sets the wing as a
reinforcement unit
that can be called in during the mission by the player.
Ignore For Counting Goals means that the ships
in this wing
will not change the numbers in directives including sexps like
is-destroyed-delay, etc. i.e the number of ships that
need to be
destroyed will remain the same regardless of whether ships in this
wing are
destroyed or not.
No Arrival Music turns off the music when
certain wings
arrive. Similarly, No Arrival Message turns off
the built
in-in messages that ships send on arrival.
No Dynamic Goals helps ensure that ships in this
wing only
follow the orders they have been given. Care must be used with
this setting as
it does mean that ships won't take much evasive action when being
shot at.
Delete Wing deletes all of the ships in the
wing, while
Disband Wing leaves the ships in the same place
but makes them
individual ships again rather than part of any wing.
Objects Editor
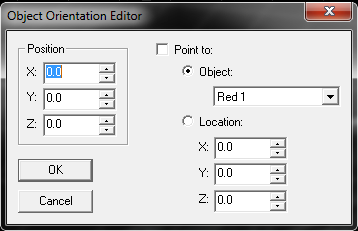 This editor allows you to
positions with a great
deal more accuracy than you could using your mouse. If you have
selected
multiple objects they will all move relative to the marked object.
Using
Point To allows you to make the selected
object(s) point to
another object or a point in space. The latter can be useful when
you want to
make a ship point straight up or down, etc.
This editor allows you to
positions with a great
deal more accuracy than you could using your mouse. If you have
selected
multiple objects they will all move relative to the marked object.
Using
Point To allows you to make the selected
object(s) point to
another object or a point in space. The latter can be useful when
you want to
make a ship point straight up or down, etc.
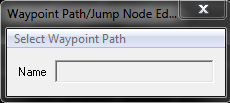 Waypoints are
points in space that the game uses for
various things (giving ships orders to fly to certain places, for
instance).
Unlike Navpoints they can not be viewed by the player as they are
only really
used by the game itself.
Waypoints are
points in space that the game uses for
various things (giving ships orders to fly to certain places, for
instance).
Unlike Navpoints they can not be viewed by the player as they are
only really
used by the game itself.
This editor allows you to change the ugly and confusing default
names into
something easier to use. This allows you to rename a waypoint
path. This could
be useful if you have so many paths that it's hard to keep track
of the
numbers.
If you're working on a game that features jumpnodes (Diaspora
doesn't) you
can also rename them here.
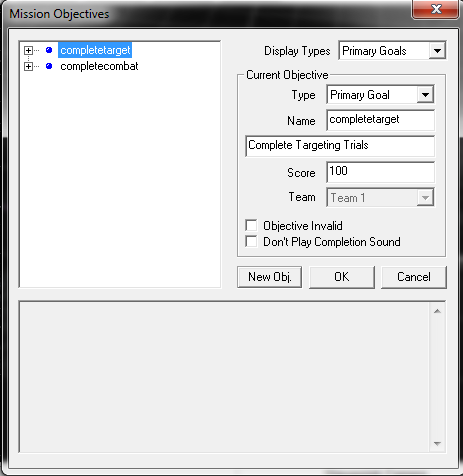 This editor (often called the Mission
Goals Editor since the
SEXPs refer to goals not objectives) allows you to set up the
player's
goals/objectives for the mission (both words are used
interchangeably but do
not confuse objectives/goals with directives as they are something
different).
This editor (often called the Mission
Goals Editor since the
SEXPs refer to goals not objectives) allows you to set up the
player's
goals/objectives for the mission (both words are used
interchangeably but do
not confuse objectives/goals with directives as they are something
different).
Primary and Secondary goals do
not have
much difference beyond where they are displayed on the mission
briefing screen.
Bonus goals on the other hand do not appear anywhere in the game
until they are
completed.
The Name of the goal appears if you press F4
and look at
your mission objectives while the line below is the one that
appears in the
mission briefing. Completing a goal will add to your Score.
You need to specify which Team gets the points
if you are
making a multiplayer team vs team mission but otherwise you can
ignore this.
Objective Invalid allows you to prevent goals
appearing or
becoming true until they are made valid using the validate-goal
SEXP.
This allows you to make a goal possible only if other things have
happened in
the mission.
Don't Play Completion Sound prevents music being
played
when this goal is completed.
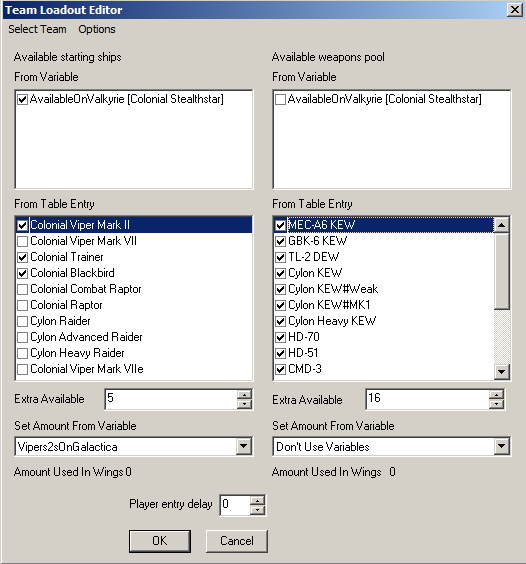 By default when the player starts the mission he
will able to fly
the ship assigned to him in the main FRED screen with whatever are
its default
weapons.
By default when the player starts the mission he
will able to fly
the ship assigned to him in the main FRED screen with whatever are
its default
weapons.
If you use this editor the player will then be able to choose
from the ships
and weapons you have given them access to here (There is a similar
list in the
Campaign Editor which may disallow ships enabled here though).
In multiplayer TvT games you will need to use this editor to set
up the
loadout for both teams. You can however use Balance Teams
from
the Options menu to copy the currently selected
team data over
that of the other team.
The editor is basically split in two with the left controlling
ship loadout
and the right controlling weapons. The two are basically the same
so we'll only
cover ships here. In order to select a ship class you must select
a line from
the From Variable or From Table Entry
boxes.
You then use the Extra Available option to set
the number of
ships of that class that are available (or use Set Amount
From
Variable to set the number available to the value of a
variable).
Using variables is only of any use in a campaign (where you can
set the value
of the variable in one mission and then use it in a later one).
For a stand
alone mission you might as well ignore them.
Amount Used In Wings shows you the number of
ships of the
selected class that are already present in friendly wings. Player
Entry
Delay is a delay on mission start before the player
will be allowed to
do anything.

The background editor allows you to have two different
backgrounds in a
file. Only the first one will be used in the game though. You can
use the
second one to make it easier to Import entire background settings
from other
missions though. By using the Swap With option you can then
compare the two
backgrounds against each other and decide which one you
prefer.
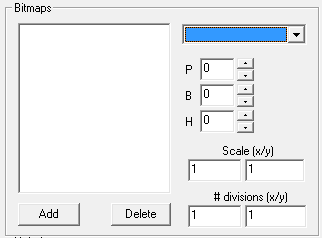
Bitmaps and Suns work in much
the same
way. They allow you to take premade images and add them to the
background of
the mission. Suns give out light unlike
bitmaps. Choose the image from the drop down menu
and click
Add (at time of writing there is a bug where this
works
backwards but that might be fixed by the time you read this).
The settings below the drop down allow you to set the
Pitch, Bank and Heading
of
the image. This allows you to choose where the image will appear
in the
mission. All three are in degrees so changing them in 5 degree
steps will
quickly allow you to see how they work.
Scale is used to decide how big the image will
be.
Divisions is an old setting that has little
effect in
modern missions.
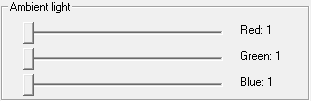 Ambient Light
allows you to set the colour of the ambient lighting present in
the mission.
Ambient Light
allows you to set the colour of the ambient lighting present in
the mission.
 The Nebula
settings allow you to set up two very different kinds of nebulae.
The top half
of the section mainly deals with full nebula missions. The bottom
half sets up
nebulae of the types used in FS1 and is unused in Diaspora. It
basically works
in a way similar to the bitmaps or suns
section.
The Nebula
settings allow you to set up two very different kinds of nebulae.
The top half
of the section mainly deals with full nebula missions. The bottom
half sets up
nebulae of the types used in FS1 and is unused in Diaspora. It
basically works
in a way similar to the bitmaps or suns
section.
Full Nebula turns on the nebula system. The
Poofs tickboxes allow you to choose which colour
clouds will
appear in the nebula.
Range determines how much the nebula affects
DRADIS. Ships
more than half this distance from the player can not be picked up
on DRADIS
properly and will appear as intermittent signals. Ships that are
beyond this
distance can't be picked up at all.
Pattern determines the main background for the
mission.
Lightning Storm allows you to set the mission in
a much
more turbulent nebula, even one that disrupts communication and
HUD
functions.
Fog Near and Fog Far Multiplier
affect how
far into a nebula ships are visible.
 Takes Place Inside
Subspace is a Freespace 2 setting that allows you to
set up missions
that don't take place in normal space. It is of little use in
Diaspora.
Takes Place Inside
Subspace is a Freespace 2 setting that allows you to
set up missions
that don't take place in normal space. It is of little use in
Diaspora.
You specify the Number of Stars (0 to 2000)
that will
appear in the background of the mission by moving the slider bar
but this is an
older technique which has since been superseded by the use of a Skybox
Model. A suitable starfield model is provided with
Diaspora and most
other FS2_Open games will also provide their own models. Skyboxes
can also be
used to add large, higher quality background images than the
bitmap panel can.
The tradeoff is that you can't position or resize them without
editing the
Skybox itself (Something you can't do from in FRED).
Skybox Flags can be used to alter the way
skyboxes will
appear in-game. Few people alter these settings from the default
though.
FS2_Open will automatically generate an Environment Map
on
running the game, but if you wish to specify one of your own, you
may do so
here.
Reinforcements Editor
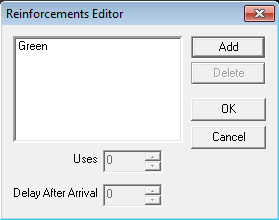
This editor allows you to set a ship or wing as reinforcements
which can be
called in via the comms menu in-game.
Uses allows you to change the number of times
you can call
a wing in. Obviously it does nothing for single ships as they can
only be
called once. For wings this is basically the number of waves that
can be called
in. After you have called in reinforcements you must wait Delay
After
Arrival seconds before you'll be allowed to call
another wave in.
Mission Specs Editor
This editor allows you to set various settings that affect the
mission as a
whole.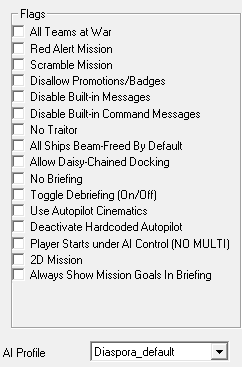
All Teams at War tells the game to ignore all
the rules
about which teams hate each other and assume everyone attack every
other
team.
Scramble Missions do not allow the player to
chose their
ship or customise their loadout.
Disable Promotions/Badges means that the player won't win any
medals or gain
rank from this mission. Very useful when you have a mission away
from the
player's home base and there wouldn't be anyone to give him a
promotion.
Disable Built-in Messages allows you to turn off
all the
automatic messages the game will send from all sources while Disable
Built-in
Command Messages only turns of the ones send from the
Command
Persona.
If the player attacks friendly ships the game will send an
automatic message
warning them to stop, if they do not they will be branded a
traitor and all
friendly ships will become hostile to them. If the player survives
the mission
he will be given a special debriefing as a traitor and the mission
will be
considered a failure. You can turn off all this behaviour simply
by ticking
No Traitor.
FS2_Open automatically turns off all beam weapons on turrets.
There are
SEXPs to turn them back on (Beam-free and Beam-free-all)
but
since this is somewhat tedious, All Ships Beam-Freed by
Default turns beams on for all ships. None of this has
any effect in
games like Diaspora since there are no beam weapons in the first
place.
Allow Daisy Chain Docking is used to tell the
game that
your mission contains ships docked in this sort of fashion
A->B->C->D.
Simply docking everything to A is allowed without needing to do
anything.
No Briefing prevents the game from displaying
the briefing
screen at the start of a mission.
Toggle Debriefing turns off debriefings for all
game modes
except multiplayer dogfight where it replaces the kill matrix with
a normal
debriefing.
Player Starts Under AI Control does exactly what
you'd
expect. It is mostly used in tutorials or in-game cutscenes.
Always Show Mission Goals In Briefing makes the mission
goal screen appear during the mission briefing even when it
usually wouldn't (e.g. in a training mission).
AI Profile is used to pick which of a set of
preprepared
game settings will be used. In general you should use the default
one for the
game the mission is for.
Custom Wing Names
 The Custom Wing Names dialog is
used to set the names of the wings that appear in Loadout and on
the HUD.
The Custom Wing Names dialog is
used to set the names of the wings that appear in Loadout and on
the HUD.
Starting Wing Names is used to determine the
names of the
wings that will appear on the loadout screen of the briefing in
every type of
mission except multiplayer TvT missions.
Squadron Wing Names is used to determine the
names of the
wings that will be shown on the HUD. FS2_Open will show the status
of any of
the five wings named on this line.
Team verses Team Wing Names is the equivalent of
Starting
Wing Names for TvT missions.
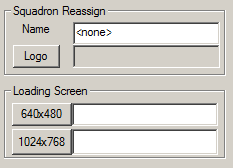 You can use the
Squadron Reassign panel to put the player in a
particular
squadron for the duration of this mission. (This contrasts with
their regular
multiplayer squadron.)
You can use the
Squadron Reassign panel to put the player in a
particular
squadron for the duration of this mission. (This contrasts with
their regular
multiplayer squadron.)
You can give the squadron a Name and specify
what
Logo will be painted on the side of the player's
ship.
The game allows you to pick Loading Screens for
the two
main supported resolutions from this panel too. The image will be
shown while
the mission loads.
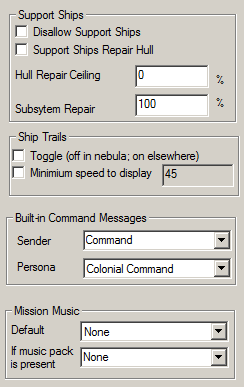 Some games on
FS2_Open allow
you to use support ships in order to rearm. If you Disallow
Support
Ships, the player cannot reload their secondary weapons
after the
mission begins. You can also allow Support Ships to repair hull
damage from
here and set a limit on just how well they can repair it or
destroyed
subsystems using the Hull Repair Ceiling/Subsystem Repair
options.
Some games on
FS2_Open allow
you to use support ships in order to rearm. If you Disallow
Support
Ships, the player cannot reload their secondary weapons
after the
mission begins. You can also allow Support Ships to repair hull
damage from
here and set a limit on just how well they can repair it or
destroyed
subsystems using the Hull Repair Ceiling/Subsystem Repair
options.
The Ship Trails panel is used to turn the smoke
trails
ships can be set to leave behind on or off.
The Built-in Command Messages options allow you
to set the
name and persona that is used for sending the built-in messages
that the game
can send. By default these messages are sent by #Command.
Mission Music indicates what music is played
during the
mission. Some games include music as an optional download in order
to reduce
the amount that must be download. In this case you can specify a
track to be
played If Music Pack Is Present and a Default
that you know the game will be able to find.This allows you to for
instance
make missions for Diaspora R1 which can use music from R2 if it is
also
present.
Global
Ship Flags
Editor
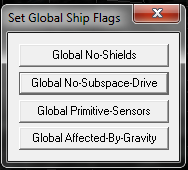 This editor simply allows you to set ship
flags for all
the ships currently present in a mission. You could have the
effect by simply
selecting everything and using the Ship Flags Dialog.
This editor simply allows you to set ship
flags for all
the ships currently present in a mission. You could have the
effect by simply
selecting everything and using the Ship Flags Dialog.
Voice Acting Manager
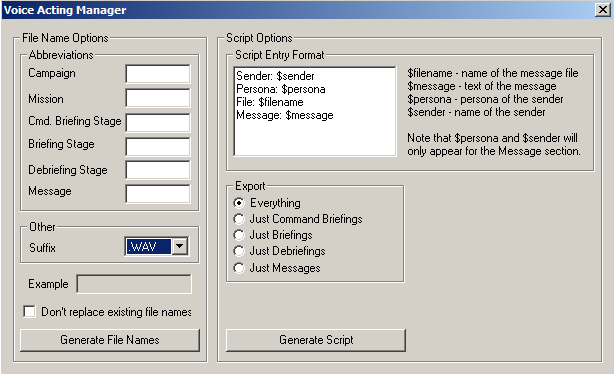 The voice acting manager allows you to set
the file
names for messages and briefings in the mission and allows you to
easily
generate a script for the mission. The editor doesn't actually do
anything you
couldn't do manually but it greatly speeds up the process of
adding voices to a
mission and the auto-generation of a script allows you to easily
get all the
speech in the game into a text file which doesn't have the rest of
the mission
data in it. This can then be handed out to potential voice actors.
The left
side of the editor deals with filling in file names, the right
with script
auto-generation.
The voice acting manager allows you to set
the file
names for messages and briefings in the mission and allows you to
easily
generate a script for the mission. The editor doesn't actually do
anything you
couldn't do manually but it greatly speeds up the process of
adding voices to a
mission and the auto-generation of a script allows you to easily
get all the
speech in the game into a text file which doesn't have the rest of
the mission
data in it. This can then be handed out to potential voice actors.
The left
side of the editor deals with filling in file names, the right
with script
auto-generation.
Abbreviations allows you to add a short suffix
to all the
messages of that type. So all the command briefings will be xxxx1-cmd,
xxxx2-cmd while the debriefings can be xxxx1-deb,
etc.
Suffix should be set to the same format as the
sounds you
are recording. This ensures that the file name ends up with the
right file type
suffix depending on whether the sound is a .ogg or .wav.
Don't Replace Existing File Names as might be
expected
won't replace any filenames already defined in the mission. Use
this for
cleaning up a mission you've already added voice acting to.
Once you've set up all the filenames correctly you can just press
the
Generate File Names button.
Script Entry Format allows you to decide which
order you
want your script entries to appear in. You may only want the
messages
themselves to appear in the script or you may want the filenames
too so your
voice actors save them with the correct names. It's up to you.
The Export radio buttons allow you to choose
which parts of
the mission you want to appear in the script. Once you've decided,
press the
Generate Script button and the script will be
saved to the
missions folder.
Fiction Viewer Editor
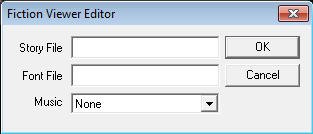 Diaspora has not used the fiction viewer at
time of
writing but all it really does is display a single text file. The
controls
should be pretty self explanatory.
Diaspora has not used the fiction viewer at
time of
writing but all it really does is display a single text file. The
controls
should be pretty self explanatory.
Command Briefing Editor
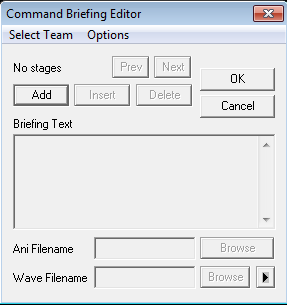 This
editor controls the first of two briefing types the
game allows. Command Briefings will play an animation in the
corner and display
some text and are generally used to give a broad overview of the
mission or the
events leading up to it. Briefings and Debriefings are always
split into
stages. The game plays the stages in order. In the case of the two
briefings
editors only one stage is played at a time.
This
editor controls the first of two briefing types the
game allows. Command Briefings will play an animation in the
corner and display
some text and are generally used to give a broad overview of the
mission or the
events leading up to it. Briefings and Debriefings are always
split into
stages. The game plays the stages in order. In the case of the two
briefings
editors only one stage is played at a time.
To create a command briefing you must first Add
a stage
(afterwards you may use Insert if you need add
stages in front
of this one).
You then add the text you wish to have displayed into the Briefing
Text box.
Ani Filename allows you to choose the name of
the animation
that is displayed with this briefing.
Wave Filename is the name of the voice acting
file you want
played during the command briefing.
Briefing Editor
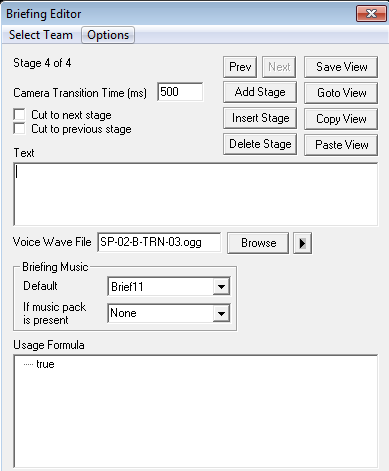 The second of the briefing editors usually
is used to handle the details of
the mission itself. As with the Command Briefing Editor, briefings
are divided
into stages.
The second of the briefing editors usually
is used to handle the details of
the mission itself. As with the Command Briefing Editor, briefings
are divided
into stages.
When making multiplayer Team vs Team missions you must use the
Select Team menu to decide which team gets this
briefing. If
you do not do this, both teams will get the same briefing.
Camera Transition Time dictates how long the
game will take
to move from one stage of the briefing to the next. This allows
you to make it
so that the icons for ships seem to move. If you don't wish to do
this, the
Cut To Next/Previous Stage tickboxes allow you to
fade from
one stage to the next with a burst of static.
As you might expect, Text is the actual text
which will be
displayed for this stage of the briefing. You can also choose a Voice
Wave
File if you have voice acting for this briefing.
Briefing Music has two entries. The game will play the tune
specified by
If Music Pack Is Present if it can find it,
otherwise it will
play the Default. In general you should look at
both lists and
if they are the same, just specify a Default,
leaving the
other option blank.
Usage Formula is a SEXP that determines whether
this
briefing will be played or not. In most missions this is simply
left as true,
but you may wish to use SEXPs such as is-previous-event-true
to make
whether this briefing stage plays or not dependent on the events
of earlier
missions in the campaign.
The rest of the editor deals with icons. The icon system is
unfortunately
needlessly complicated but since it does allow you to see what is
going on, you
simply need to look carefully at the main window. While you work
with the
briefing editor, the main view will shrink to a much smaller size.
It is worth
remembering that the grid will still be displayed as seen when the
game
actually runs. This allows you to place icons onto the grid in
such a way that
they appear to move during the briefing. Although you can rotate
the grid as
usual with the editor open, your changes to the view will only
reset if you
choose Save View. Similarly Goto View
resets
to the last saved view. Copy View and Paste
View allow you to copy and paste the view from one
stage to another.
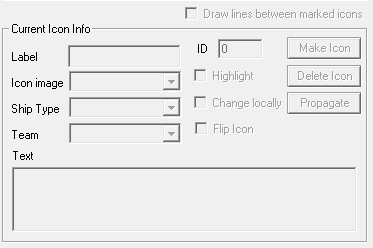 In order to create an icon you must select
a ship and
press the Make Icon button. Icons appear only on
the current
stage but you can Propagate them to all later
stages.
In order to create an icon you must select
a ship and
press the Make Icon button. Icons appear only on
the current
stage but you can Propagate them to all later
stages.
Label is the name of the ship that will appear
in the
briefing. This doesn't have to be the real name of course. Image
Icon is the type of icon that will appear and this is
determined in a
rather arcane fashion based on the species of the ship (Cylons or
Colonials).
The image is of course visible so play around with the setting and
Team until you get the one you're after. Ship
Type determines the ship that will be shown if you
click on the icon
in-game. Changes to these settings will also change the same icon
in other
briefing stages unless Change Locally is set.
Highlight allows you to show an icon is
important to this
stage of the briefing by making it stand out.
Flip Icon, flips the icon horizontally. It is
basically
useless for the DRADIS icons used in Diaspora but other games use
icons of the
ships and sometimes wish for them to point in the opposite
direction.
Finally, if you select more than one icon you can Draw
Lines Between
Marked Icons.
Debriefing Editor
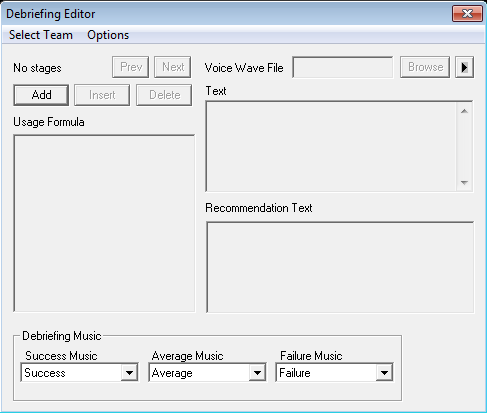 As with the Briefing and Command Briefing
editors, this
editor also allows you to split up your debriefing into stages.
This is very
important as which stages are played is dependent on whether or
not the player
completed his mission objectives.
As with the Briefing and Command Briefing
editors, this
editor also allows you to split up your debriefing into stages.
This is very
important as which stages are played is dependent on whether or
not the player
completed his mission objectives.
Usage Formula is used to determine under which
conditions a
particular stage is played. If the formula evaluates to true the
Text is shown. Recommendation Text
is only
shown if the player presses the button to see it. This is
generally used to
give the player advice on how to complete some part of the mission
that they
have failed.
Debriefing Music allows you to choose which
music will be
played. The number of goals completed determines whether you get
the
Success, Average or Failure
music.
Shield System Editor
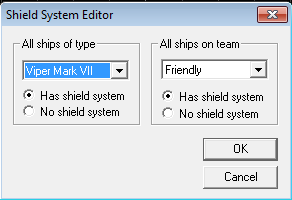 This editor is useless in Diaspora since
ships do not have shields. In other
FS2_Open games it allows you to turn off all the shields for one
particular
class of ships or one particular team of ships.
This editor is useless in Diaspora since
ships do not have shields. In other
FS2_Open games it allows you to turn off all the shields for one
particular
class of ships or one particular team of ships.
Asteroid Field Editor
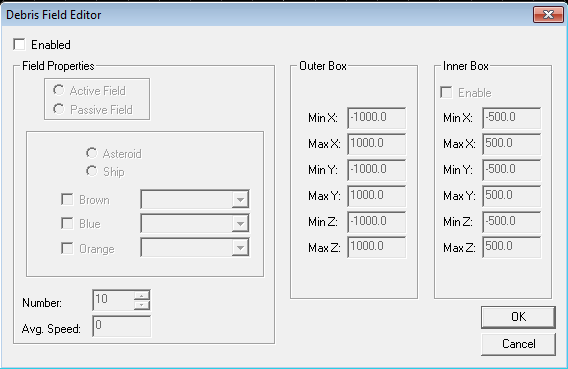 Also
known as the Debris Field Editor this editor
allows you to
create a field of asteroids or ship debris over a certain area.
FS2_Open
supports two types of asteroid fields Active and
Passive. Debris can only be Passive.
Active fields will actually fling asteroids at
any large ship
entering them. These asteroids will appear with a white targeting
border around
them and can be shot down before they hit the ship but this will
initially lead
to them splitting in half. Passive fields
unsurprisingly just
sit there.
Also
known as the Debris Field Editor this editor
allows you to
create a field of asteroids or ship debris over a certain area.
FS2_Open
supports two types of asteroid fields Active and
Passive. Debris can only be Passive.
Active fields will actually fling asteroids at
any large ship
entering them. These asteroids will appear with a white targeting
border around
them and can be shot down before they hit the ship but this will
initially lead
to them splitting in half. Passive fields
unsurprisingly just
sit there.
The Brown, Blue and
Orange boxes denote the kind of asteroid in each
field. You
can have as many kinds in the field as you wish. Obviously you
must have at
least one kind so if you leave them all unselected the engine will
pick one for
you.
If you instead choose to have ship debris, you can use the 3
pulldown boxes
to choose which races/ships the debris is made up of.
The Number of asteroids generated can have an
effect on
performance. Especially in very dense fields. You can also set the
Average Speed of the asteroids here. Setting this
to 0 will
make the asteroids stationary.
For all kinds of field you must decide on an Outer Box
which denotes the size of the field. If you have an Active
Field, you can also denote an Inner Box.
Ships within
this second box will not have asteroids thrown at them and no
asteroids will
spawn here.